Sports Photography Tips
How to Shoot Like a Pro
By Scott Umstattd
Sports Photography Tips: Sports photography is exciting and constantly changing.
Capturing the exact moment that defines the game and its players requires a lot of attention, a lot of planning and let’s face it, a lot of luck. But luck favors the prepared. And there's the first of many tips, be prepared!
Study The Sport To Anticipate The Action
It may sound simple, but a great tip is to understand how the sport is played. In soccer, for example, if you see that the offense is making strong moves toward the goal, point your camera at the goal and wait for the action to come to you.
In just a few seconds the goalie may be making a diving block. Don't just follow the ball. See where the ball is going and put your focus there.
It’s important to understand how the sport you are covering is played.
Being ahead of the action will give you a better chance of capturing a front page style shot. But to be ahead of the game, you need to know the game.
Zoom Zoom Zoom
|
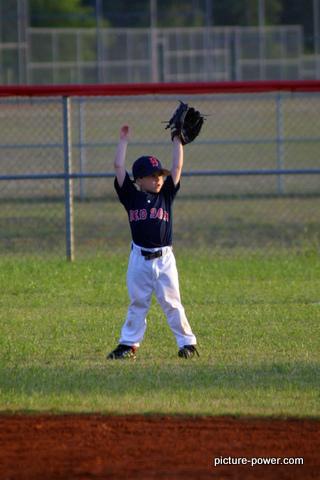
Unless you have permission to run freely on the field, you are going to need a zoom lens. And if you do have permission to run freely on the field, please share your sports photography tips with us! I’m sure you’ve seen professional sports photographers with lenses that extend out a foot or two or sometimes three feet from the camera. There is a reason why these pro photographers use these lenses; they are awesome! Just to give you an idea, the photo on the right was taken with a Canon 100-300mm f/5.6-6.4 zoom lens (not an awesome lens). Even though I was zoomed in all the way to 300mm you can see, even on a small Little League field, 300mm doesn't get in close enough. |
You may have noticed looking at pictures of pro sports photographers that they use a tripod or a monopod when using those big lenses. They use tripods and monopods for two reasons. One, those lenses are heavy and holding them up for an entire game can wear muscles out. Putting their equiptment on a tripod or monopod gives their muscles a break.
The other reason the pros place their cameras and lenses on tripods and monopods is because when they use a telephoto zoom lens their own movement begins to affect how the picture is rendered. When zooming in tight a little movement on your part is magnified.
When using zoom lenses you have to use a faster shutter speed to get tack sharp focus and to avoid creating motion blur. There's more about all of this ahead. Keep reading.
Now, if you want to get in close, I mean real close to the action, you may want to invest in something like the Sigma 200-500mm f/2.8 APO EX DG lens and forego paying for your kids' education.
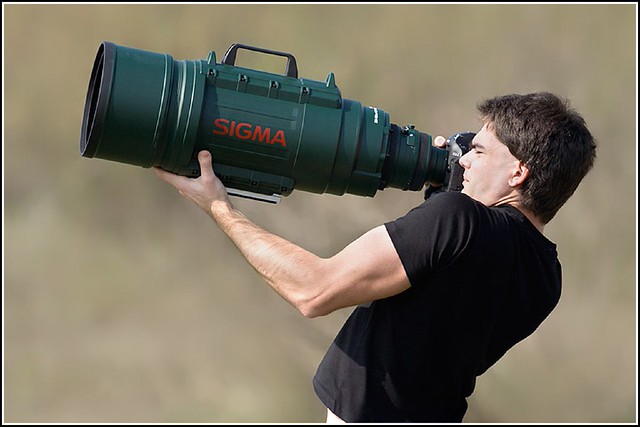
Sports Photography Tips: You don't have to be a superhero to take super pictures.
Photo credit, Flickr: Capt' Gorgeous
The Best Camera Choice
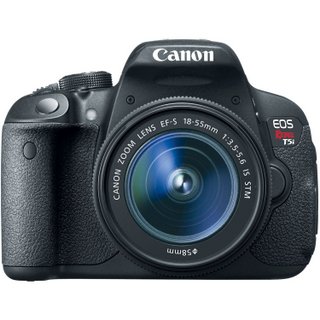
Simply put, the best camera choice for sports photography is a DSLR.
A point and shoot camera or your camera phone will not give you enough zoom and they will not have a fast enough shutter speed to stop the action in low light situations.
|
However, you don’t need a $5,000 DSLR camera. Most entry-level DSLR cameras will be sufficient (certainly not the best). But an entry-level DSLR beats a point and shoot every time in sports photography. Unless you are shooting on a full frame camera, like the Canon 5D or Canon 1D, odds are your DSLR has a crop factor of about 1.6. This means that any lens you use will increase in focal length by 1.6. |
In short, this means that a 200mm lens becomes a 324mm lens when compared to full frame sensor cameras. That means your camera is actually giving you more zoom (at the cost of less light) if you are shooting on a camera with a 1.6 crop factor.
A camera with a 1.6 crop factor has a sensor that is 1.6x smaller than a camera with a full frame sensor. A smaller sensor means it will catch less light. And so much of photography is about catching light.
With all that said, in good lighting a decent point and shoot camera can work if you are close enough to the action and use the other sports photography tips in this article. As proof, the picture below is of yours truly taken by a friend with a simple point and shoot camera.
Sports Photography Tips: Don't let your lack of equipment hold you back.
The Best Lens Choice
|
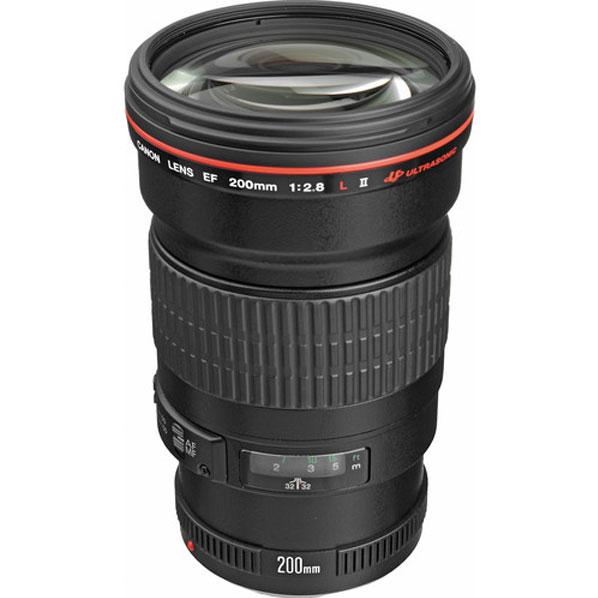
Sports photography tips for lenses shouldn't necessarily lead you to spend thousands of dollars to get up close to the action. The Canon 75-300mm f/4-5.6 III USM lens can help you fill the frame without breaking your budget. But this lens only works well in day games where there is plenty of light. If you want a zoom that can perform well in low light situations (that won't affect your kids' education) look at the Canon 200mm f/2.8L USM lens pictured above. |
Super Lens Sidekick
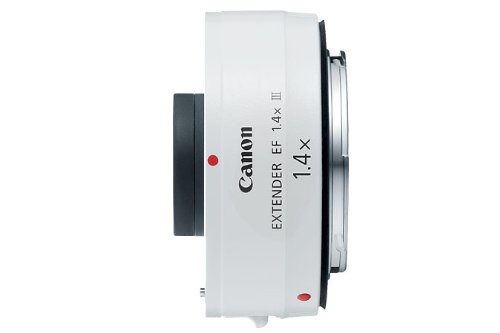
Another affordable tool you can use to bring the players front and center is an extender (sometimes called teleconverters).
Generally, there are two lengths of extenders available; those with a 1.4X and 2X magnification. Canon (and other third party manufacturers) offer this type of equipment. But, when you attach an extender you will lose an exposure stop or two and that will mean making other exposure adjustments.
Move Around
As mentioned earlier, your location during the game plays a critical role in the types of pictures you will be able to capture. If you are in the bleachers you are limited with regard to the variety of pictures you will come home with.
|
If it’s at all possible, get on the ground level and move around. Take pictures from all sides of the field. Go behind home plate to get a close up photograph of the pitcher as he releases the ball. Go to the outfield fence to get a shot of the center fielder as he prepares for the pitch to be thrown. If the batter is right handed, go to the first base side of the field so you can see his face. Moving doesn’t always mean going from one side of the field to the other. Find something that will lift you and your camera a few feet higher than eye level. Drop to one knee to get the “hero shot” of your favorite players as they make their way around the field. Lay on your stomach to give your pictures a powerful perspective. |
By moving around you are also changing your background. Poor background, nobody ever gives it much thought. Think about what is happening behind the action and move accordingly.
Compose Your Shots
While it's tempting to put your subject in the middle of your frame and fire, try to avoid that. Why? Because it's a photography rule. And while I am not one to follow the rules, this is one that makes sense. But! - I reserve the right to break this rule whenever I want to.
By placing your subject off-center you are allowing your viewer's eyes to move around your pictures. This will not necessarily be understood by the people looking at your pictures, but something in their primordial brain will like it nevertheless.
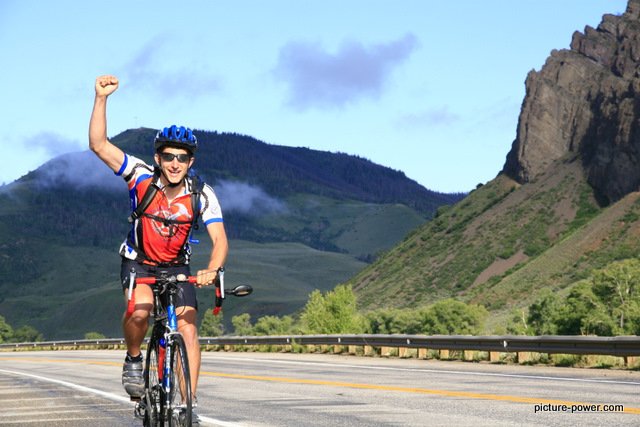
Above: By placing Ryan off-center, I've given you (the viewer) the opportunity to look around the entire picture. Since he is moving to the right, placing him on the left lets your primordial brain imagine him moving forward into the frame.
The guard rail and mountain slope also allow your eye to unwillingly move into the picture.
Before placing your subject in the middle of your picture, consider what else is around that may help lead your viewer's eyes to what you want them to focus on.
Understand Your Light Sources
|
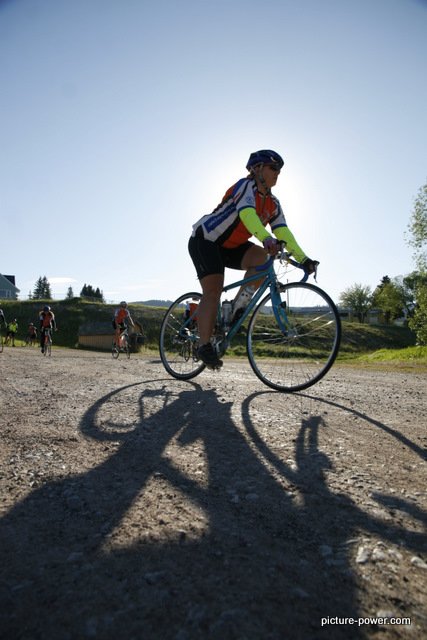
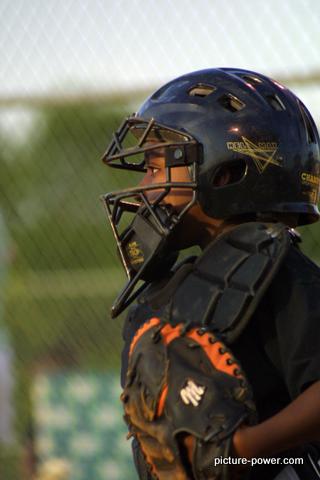
Sports photography tips also fall into general photography tips: the worst time of day to take pictures, sports or otherwise, is midday when the sun is directly overhead. This light, while bright, does not give you much chance to make the beautiful shots. Of course, you can’t control what time of day the game is played. When the sun is directly overhead it casts shadows down on faces making it more difficult to capture the emotions and reactions of the players. Put a hat on the players and the midday sun becomes a formidable opponent. The picture on the right would not have been the same had the sun been directly overhead. The setting sun brought light directly to the catcher's face rather than the top of his helmet. |
Don't Use Your Flash
|
Some sports photography tips go beyond simply helping you get better pictures. It may be tempting to put a flash on your camera or use your camera’s internal flash to shed a little light on the situation. There are two main reasons why you shouldn’t use your flash. |

|
One, it can interfere with the game. Imagine trying to shoot a free throw and a flash goes off right in your line of site. A camera flash can have a direct outcome on the game. (Don’t use this knowledge for evil. You know what I'm talking about.)
Another reason to avoid using a flash is that your camera will not be able to use a fast shutter speed if it is set for a flash exposure. Most camera’s allow a shutter speed of 1/250th or 1/200th of a second when in flash mode. To stop the action you need a faster shutter speed.
Shooting Sports Inside
Obviously, the sun is not going to help you or hurt you if the game is being played inside. While you can use the same camera whether you are inside or outside, the same cannot be said for your choice of lenses.
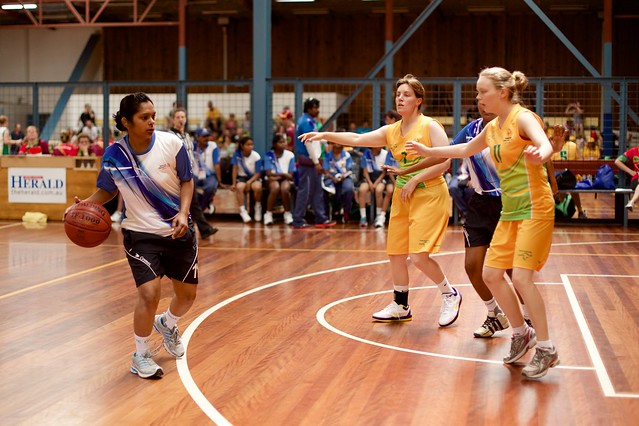
Use a wide angle lens when you are close to the action. Photo credit, Flickr: Stephen Tyler
If you are shooting basketball, gymnastics, swimming, bowling or any other sport played inside you are likely going to need a lens with a wide aperture. Wide aperture lenses can also be called fast lenses. To get the most amount of light through your lens and onto your camera’s sensor a fast lens will give you the best chance to let in the light and stop the action.
Lenses with an f-stop of f/2.8, f/1.8 or lower are considered fast lenses. One of the most popular fast lenses is the Canon 70-200mm f/2.8L IS USM. This lens is a powerhouse that is also a great lens for portraits, landscapes, anything really.
If the Canon 70-200mm f/2.8L IS USM is a budget breaker, look at the Sigma 70-200mm f/2.8.
If you are close to the action, good for you. You've obviously read some other sports photography tips in the past. But a 70-200mm zoom lens will not give you a wide enough angle to capture much more than faces. This type of lens would be best used for close-ups if you are on the court. My favorite lens when shooting basketball indoors is the Canon 17-55mm f/2.8 IS USM or its Sigma counterpart, the Sigma 17-50mm f/2.8 EX DC.
Shooting Sports Outside
|
When the game is played outside, on a sunny day, you can get away with using a slower lens since there is an abundance of light and without light it becomes very hard to take pictures. Trust me on this. Sports photography tips aside, you need light for all photography. But if you are taking pictures at a night game you are relying on lights that may give the field of play enough light but not enough for you to use a slower lens. It's a good practice to treat night games played outside like indoor games. Stadium lights don't put out as much light as the sun. Use a faster lens so you can use a faster shutter speed to stop the action. Or, if your camera performs well at high ISOs, increase your ISO setting. |
Night games played outside should be approached like indoor games. You need a fast lens to let in enough light to let you use the faster shutter speeds needed to stop the action. |
Increase Your ISO
Sports photography relies heavily on fast shutter speeds. Ideally, you want to use the lowest ISO setting your camera has to reduce noise in your pictures. But when you use a low ISO and a fast shutter speed you may find that everything is coming out too dark.
To get more light onto your camera’s sensor you can increase your ISO setting. Cameras are getting better and better with their ability to control noise. Most newer camera can handle noise at ISO 800 pretty well. Some cameras can handle noise at extremely high ISOs (like ISO 6400). This is one of my favorite (and easiest) sports photography tips.
In daylight games, you can use lower ISOs and still use a fast shutter speed. But in night games or indoor games, increasing your ISO is one of the best sports photography tips available to help you freeze the action.
Use A Fast Shutter Speed
To grab this shot I used a Canon EOD D30 (so old they are now hard to find) and my Canon 200mm f/2.8 USM lens with a 1/5000th of a second shutter speed.
Sports action moves fast. If you want to get tack sharp images (without motion blur) you’ll need to use a fast shutter speed.
To stop the general action of sports a shutter speed of 1/250th or 1/500th of a second will likely work.
If you’ve ever seen a picture of a baseball hitting the bat, the photographer used an extremely fast shutter speed to capture that image. A slow shutter speed will capture the blur of the bat as it comes through the strike zone and the ball will appear as a white streak. To stop the action, use a fast shutter speed.
Understanding the basics of exposure (the exposure triangle helps to make this easier to understand) will help you find the exposure settings needed to maintain a fast shutter speed.
Focusing Options
|
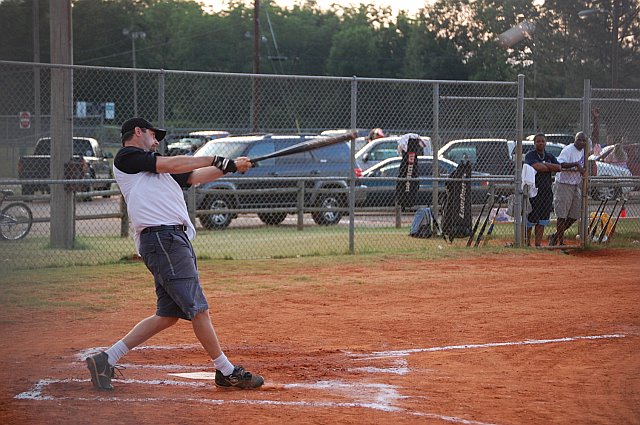
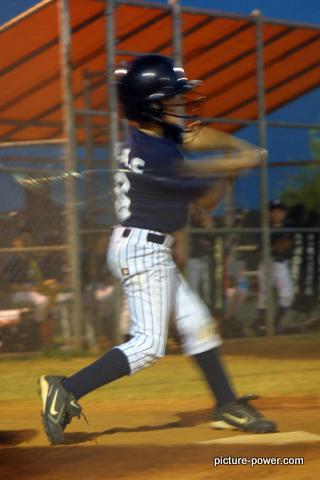
Even if you have stopped the action by using a fast shutter speed, it’s all for nothing if the subject is not in focus. Out of focus is not the same as motion blur. Motion blur is caused by, you guess it, motion. An out of focus shot means that the camera and lens did not properly lock in on your subject. In the picture on the right you can see that the shot is in focus (notice that his head and helmet have sharp, clean lines). The movement of his bat created the motion blur. Since the batter was not moving toward or away from me, using the one shot focus mode was sufficient. |
One of the best sports photography tips to get tack sharp focus is to use your camera's AI Servo focusing mode. One-shot focus mode is great for portraits, still life and architectural photography. In these instances, your subject is not moving.
AI Servo mode allows you to focus on a subject and the lens will track the subject as it moves toward you. If you are taking a picture of a player running toward you in one-shot mode you will lose your focus as soon as you get it because your subject has left the point in space where you told the lens to focus.
AI Servo focus mode will track the player as he gets closer and closer to you. This is a life saver for photographers looking for sports photography tips.
Sports Photography Tips: AI Servo mode works well when your subject is moving toward you.
The Best Shots May Not Involve Action
Remember way back at the beginning of this article when I said it’s important to understand the sport you are photographing? Here’s the most unique of all sports photography tips that will force you to stay alert (and give you something to shoot during a lull in the action).
Sometimes the best shots have nothing to do with the play on the field. It’s the impact made on players, coaches, fans and yes, even the referees and umpires. Keep a sharp eye out for these types of shots because odds are no one else is looking for them.
If you see an emotional moment building, swing around to get the fans' reactions. Or the coach’s. Life lessons are abundant in sports and as a sports photographer you should try your best to convey that in pictures. Photographers are storytellers. By capturing these kinds of moments, you are telling a more complete story.
Shoot In Burst Mode
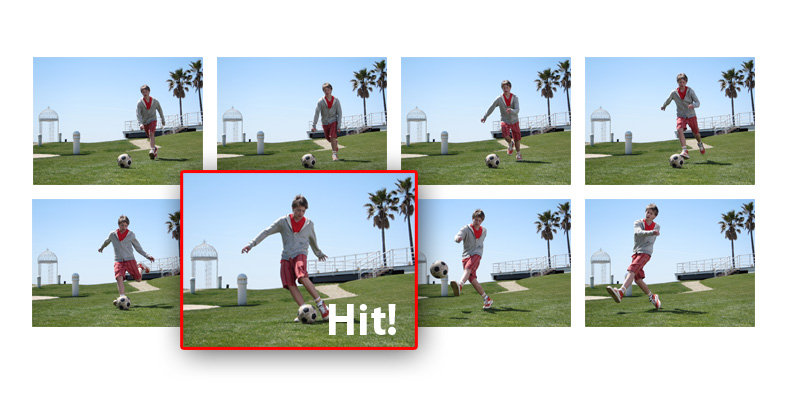
Burst mode or continuous mode will take a rapid succession of pictures. All you have to do is hold the shutter down and the camera will fire off a quick round of pictures.
Shooting in burst mode allows you to shoot faster than pressing the shutter time and time again.
When the play is happening, press and hold the shutter and you’ll have a much better chance of getting the perfect shot.
Another sports photography tip when shooting in burst mode is to shoot JPEG files. If you are shooting raw, the larger raw files will slow the rate in which the shutter is released because the camera has a lot more data to deal with.
You can read more about raw and JPEG files to better understand the difference between these two file types.
Take A Lot Of Pictures
Even the pros don’t suggest using the sniper approach when they offer their own sports photography tips.
Don’t knock yourself out because the three pictures you took at the game didn’t work out.
As with any action related photography, you need to take a lot of pictures to get three that look awesome. Players practice and you need to practice too.
Again, luck favors the prepared.
Sports Photography Tips Reviewed
- Know the Sport - knowledge is POWER!
- Zoom Zoom Zoom - get into the action without getting hurt.
- The Right Lens - makes all the difference.
- The Right Camera - gives you a big advantage.
- Move Around - change your perspective and background.
- Compose Your Shot - your camera is not a gun. Shoot off-center.
- Understand the Light Source - you can't control it. But you can work with it.
- Don’t Use Your Flash - don't become part of the game.
- Inside Sports - you need a fast lens.
- Outside Sports - you need more zoom zoom zoom.
- Increase Your ISO - this allows you to use a faster shutter speed.
- Use a Fast Shutter Speed - this will freeze the action.
- Focusing Options - AI Servo mode works great.
- Find No-Action Shots - sometimes the most moving pictures have no action.
- Shoot in Burst Mode - press the shutter and hold on.
- Take A Lot of Pictures - and be prepared to delete a lot of pictures.
See How A Pro Does It (VIDEO)
More sports photography tips: Adorama visits with John Willey, staff photographer for the Arizona Diamondbacks.
Equipment Used In The Above Video
|
Cameras |
Lenses |
Accessories |
More from picture power
photography lesson plans pack
Return Home from Sports Photography Tips
