12 Parade Photography Tips
(For Capturing Perfect Parade Pictures Every Time)
By Scott Umstattd
Everybody loves a parade. Except me... when I don't have a camera.
Parade photography tip #1: always bring a camera to a parade.
Parades can put a photographer through his or her paces. Your light is constantly changing as you move your camera from one clown to another.
You've only got a few seconds to recognize a shot and take it. And you have to deal with trying to be a decent human being as people and their pets walk in front of you and tangle themselves in your feet.
Aside from the obvious first tip, here are 12 more parade photography tips to help you make the most of these street photography extravaganzas.
12 Parade Photography Tips
Parade Photography Tips
Expect The Unexpected
This is why people come to parades. They want to be entertained and they want to be surprised. As a parade photographer, you will be both entertained and surprised as well.
While you may (and should) go in with the idea of getting a specific picture or a specific type of picture, don't become so intensely focused on getting that shot that you miss tons of other better shots.
Expect to have someone stand in front of you. Again and again. Expect to have your subjects move from direct sunlight to dark shadows. Prepare to have your special shooting spot taken by a gang of curly-haired little kids.
Being in a good head space is important. It will help you solve problems faster. Know that you can't control the parade, the sun or the other people watching. Knowing this may help you see things more clearly.
Parade Photography Tips
Know The Parade Route
By doing a little research before the parade starts you can scout out areas ahead of time that will give you the best vantage points.
You can use the best side streets and alleys to get from one prime location to another. And it will be easier to fall back on Plan B or Plan C if you know where everyone is going.
Parade Photography Tips
Let Light Lead You
If you do take the time to scout locations before the parade consider the time of day that they parade will take place. Shadows on city streets change throughout the day. If the parade takes place at 4PM try to do your location scouting at that time to see where the light is falling.
When considering where to be during a parade look for areas where the parade route is entirely in the shade. This will cast an even light on your subjects. However, you should expect to (if it's a sunny day) be dealing with a lot of harsh shadows created by the sun. There's more ahead on how to best deal with the harsh shadows parade photographers contend with.
Parade Photography Tips
Working With Your Background
You'll soon find out that your background can make or break your parade photography pictures. A background cluttered with people or things or a large swath of white blown out sky can distract from an otherwise stellar photograph. Look for clean and uncluttered backgrounds. This will help your subjects stand out more clearly.
There are three methods you can use to control your background. Two of them deal with your lens. The other with where you point it.
Let's start with where you point your lens. If you are shooting below the waist (to get that hero look) you are going to have to deal with the sky. The sky is brighter than the action down on the street and if you expose for the sky (ensuring that it is a true blue, for example) your parade subjects are going to be underexposed (dark).
If you expose for the parade your sky will then be overexposed (or too light). Read the next tip to learn more about overexposing your parade pictures.
But, if you hold your camera over your head or stand on something to lift you a foot or two above the crowd you can point your lens down, thus removing the perplexing parade/sky exposure problems.
Where you point your lens has a direct reflect on your background. That's sounds pretty basic but I felt like that needed saying.
The second option to control your background is to zoom in tighter. Using a long zoom lens (something over 200mm) will help to compress your background. Basically, this means that your background gets smaller and blurrier the more you zoom in.
Opening your lens aperture to its widest setting will also help to create a blurry background (which makes your subject stand out). Lenses with very wide apertures, like f/2.8, f/1.8 or f/1.4 tend to produce a more beautiful bokeh and when opened up can easily blur your background. A blurry background is a less distracting background.
Parade Photography Tips
Overexpose Your Pictures
Any outdoor event will present challenges to a photographer. The sun can be strong one minute and behind a cloud the next. In parades, people can move in and out of light with just a few steps.
In situations where it feels like the sun is working against me, I will intentionally allow some areas to be overexposed in order to get a better exposure on my subject. This means, for example, I will accept a blown out sky if that's what it takes to make my subject look better.
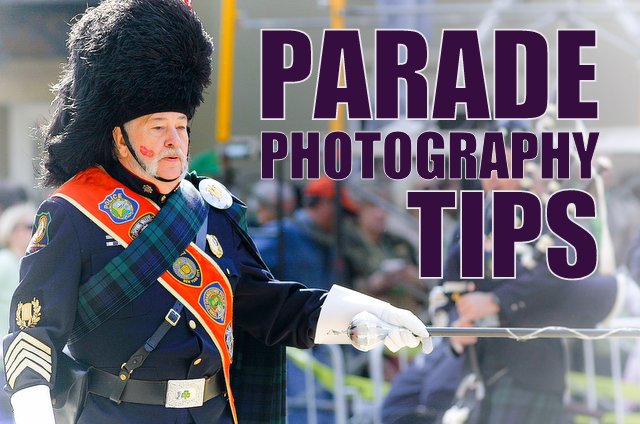
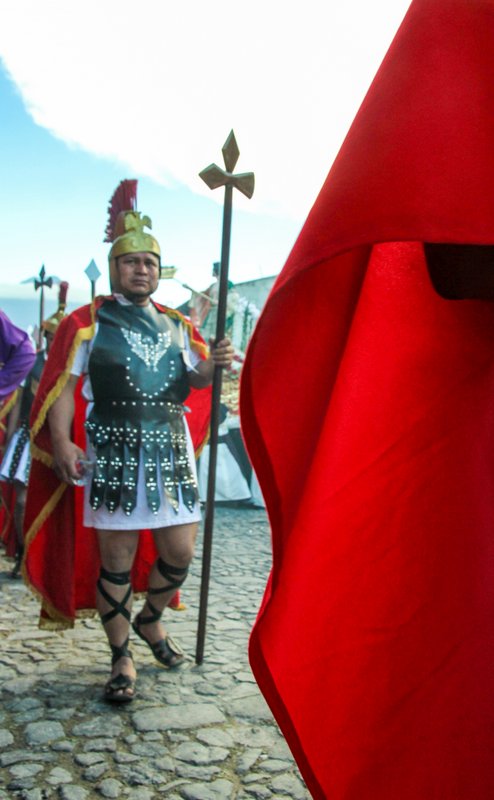
In the example picture here, you can see that the sky is blown out (overexposed) but the man (my subject) is properly exposed. Had I exposed this picture to get a nice blue sky, my subject would have come out underexposed.
Parade Photography Tips
Don't Settle On One Location
Your ability to move around may be limited if you are carrying a couple of kids, your gear bag and the kids' specially packed parade bag. If you are stuck in one place move your camera above your head and below your waist. Mix things up a little. Pictures taken from below the waist will make your subjects appear more powerful. Pictures taken from above your head can help to provide a wider perspective of everything around you.
If you can move around, then move around! Changing your location will change your background, lighting and of course moving around provides more variety in your pictures.
Parade Photography Tips
Don't Settle On One Shutter Speed
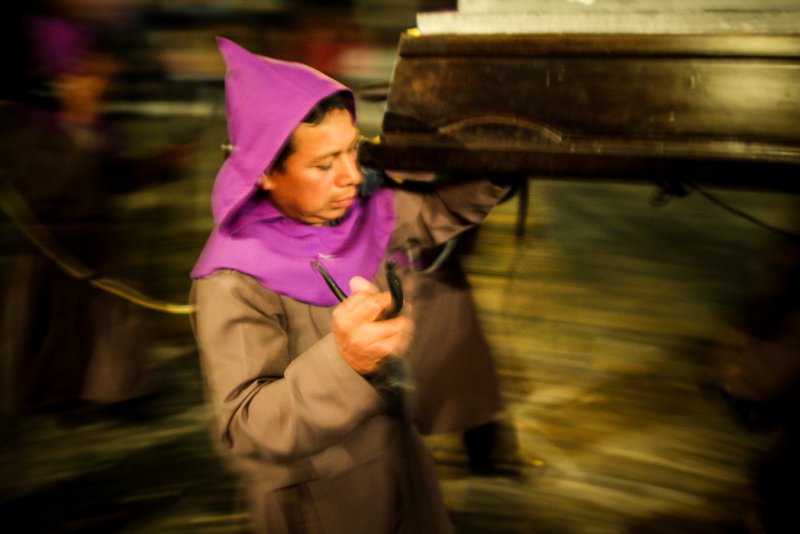
For the most part, you want to use a shutter speed fast enough to get sharp pictures. But if you slow your shutter speed a little or maybe a little more you can capture the motion of the parade as it passes you by.
One technique that takes a little trial and error to perfect is to move your camera sideways in an attempt to track your subject in the lens. This is called panning. When done correctly, this creates a blurry background (because of your movement) while your subject remains in focus.
Odds are, you will take more pictures that fail than succeed when using a slower shutter speed. Don't let that keep you from trying.
Parade Photography Tips
Corners Rule
If you can position yourself on a street corner you will have some more options.
You can get the parade coming and going, you're lighting could be completely different from one street to another and things tend to slow down a bit as the parade maneuvers around the corner which can give you time to take more than one quick picture.
Parade Photography Tips
Shoot With Both Eyes Open
This is another parade photography tip that may take a little practice. Anytime you are photographing an event - whether it's a sporting event, charitable event or a wedding - you have to be able to look at the action (one eye on the event) and pinpoint the action (the other eye in the viewfinder) at the same time.
This doesn't mean that you walk around the whole time with both eyes opened and glazed over from so much staring. Shooting with both eyes open simply helps you do two things at once. And, when you are involved in any kind of observational photography this skill comes in handy.
Parade Photography Tips
Don't Chimp
On the same thought as shooting with both eyes open, don't chimp (looking at your LCD after each picture). Sure, you're going to look at it. But don't look at every picture you take as you are in the moment because that moment will not happen again and it will pass you by pretty quick.
Once you know you have locked in on the right exposure parade photography is like picking apples. You see a good one, you pick it and put it in the basket with the others. Then move on. You can check out all your apples in more detail later.
Parade Photography Tips
Edit in Black and White
There are a couple of reasons to consider editing your parade photos in black and white.
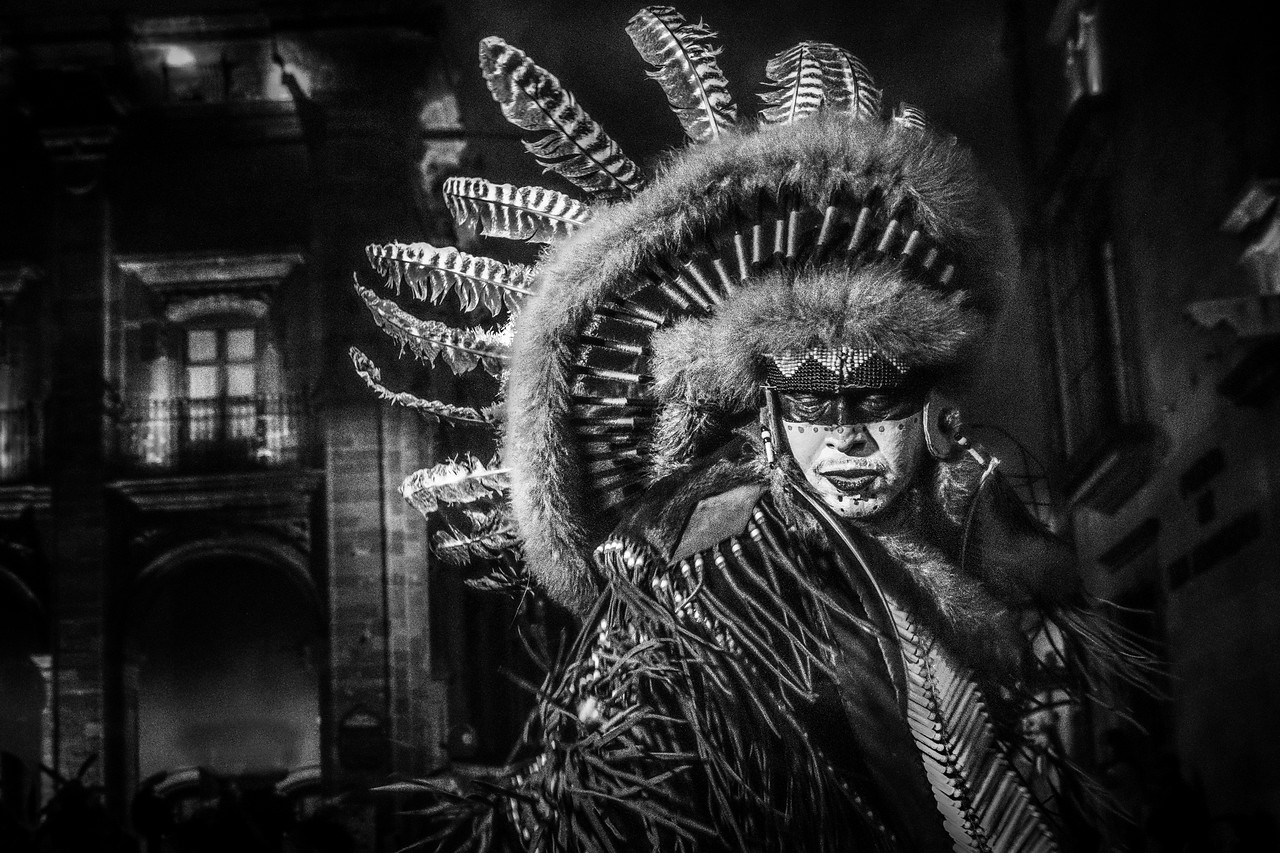
One reason is that you are likely to encounter a rainbow of colors in a parade. When you change a color photo to black and white you can play around with the color settings (yes, color makes a difference in black and white photography). By adjusting the color settings you can change the dynamics of your black and white image.
Another time to consider editing your parade photos in black and white is when you are taking pictures in total shade. Sometimes, without the influence of direct sunlight, pictures taken in the shadows may appear a bit dull and lifeless because there is not a particular color that stands out. By editing these images in black and white you can put more focus on the subtle contrasts between the light and dark areas. This can give your image more pop.
Not to mention that black and white photography has a timeless and classic feel that color photography is unable to replicate.
Parade Photography Tips
Lens Options and Ideas
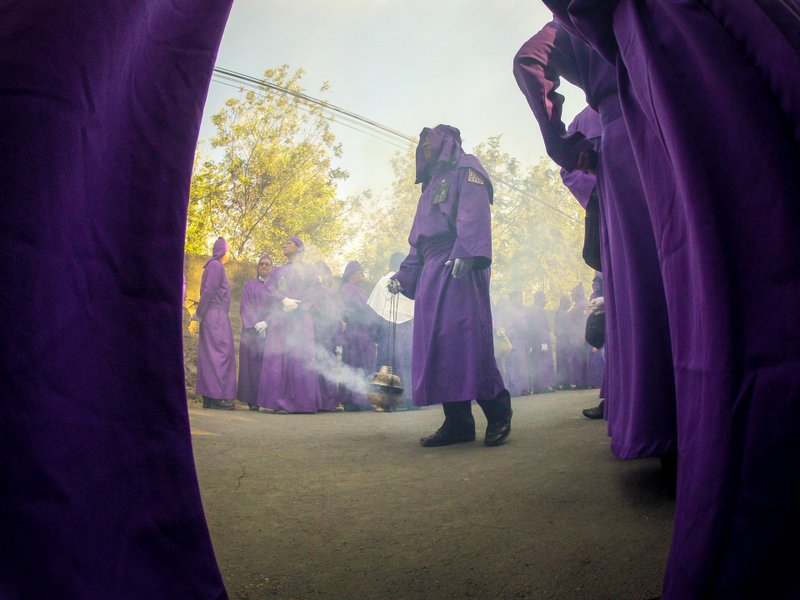
Lenses are incredibly important. They set visual barriers for you. If you are shooting at a 15mm focal length you have to see what's in front of you with 15mm eyes. This wide of an angle means that you are shooting "the big picture" and probably not focused on the details.
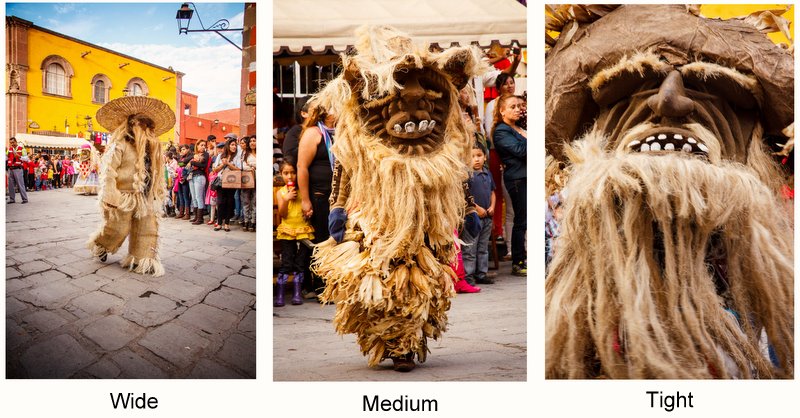
When shooting any event, be sure to get wide, medium and tight shots. A zoom lens can be used to get a wide shot if you move far enough away from the bigger picture. A wide shot doesn't focus on details. A wide shot is used to establish a scene.
A medium shot is closer than a wide shot and lets the viewer see a bit more detail as your subject is a little closer and therefore bigger in your frame.
A tight shot is one that brings in a lot of detail. Tight shots are not concerned with showing everything. A tight shot will allow your viewer to see the finer details of something you have found interesting.
One lens can create wide, medium and tight shots. To get each of these perspectives using only one lens you will have to move closer to or farther from your subject.
As far as lens choice, I typically use the Canon 15-85mm f/3.5-5.6 IS USM, the Canon 200mm f/2.8L USM and my GoPro Hero2 when covering parades.
The Canon 15-85mm covers a great focal length. I can easily get a wide shot and immediately get a medium or tight shot with a simple twist of the wrist. The GoPro lets me go very wide. It's small size is a better option than carrying another DSLR and lens.
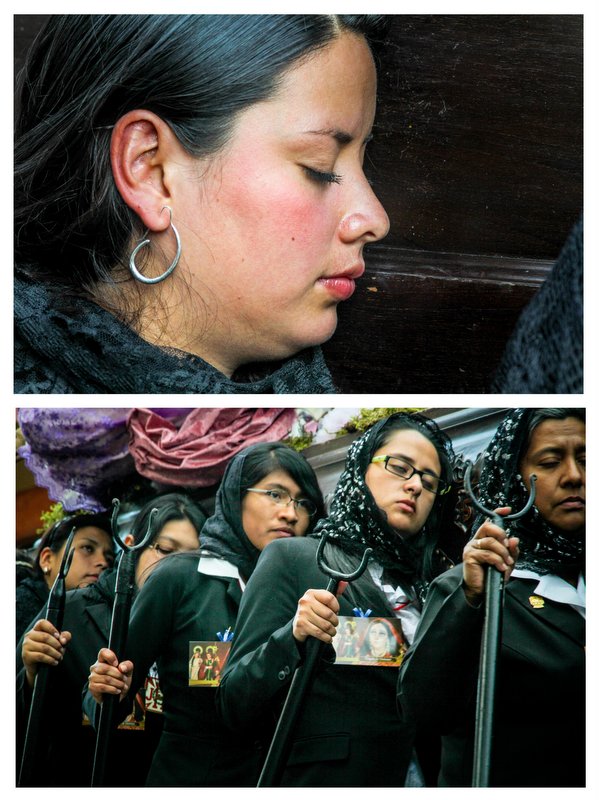
My Canon 200mm lets me put much more focus on someone's face if they are close to me and it also lets me pull in shots that the Canon 15-85mm couldn't reach.
If I had to photograph a parade and could only take one lens it would be my Canon 15-85mm f/3.5-5.6 IS USM. The focal length is great (especially for parade photography) and the pictures come out good (though not as good as the pictures produced by the Canon 200mm f/2.8L USM).
It's important to cover any event with a variety of pictures from different focal lengths. The picture above (top photo) has little meaning without the picture below it that provides context. Keep in mind that you want to tell a story with your parade photography pictures.
Parade Photography Tips - Conclusion
I love observational photography. Everything happens in real-time and there are no do-overs.
 |
Parades put my senses on overload. They demand that I see things before they happen. They force me to trust my gut. Parades provide a steady flow of ever-changing light, color, people, and shapes. I feel like a kid being timed for speed as he runs through a candy shop trying to grab the best candies when photographing parades. |
Just like this kid in the candy shop, you have to have a plan and you have to know that you will not come out with every piece of candy you wanted.
Find spots that give you an interesting or non-distracting background. Look for areas that have good lighting. Follow the movements of the parade. Be prepared to run through a side street. Always keep one eye on the action. Get the right exposure and keep pressing the shutter without looking at every picture you take. And be sure to mix up your shots with wide, medium and tight focal lengths. This helps to tell a better story.
Finally, bring a bottle of water and eat your cotton candy after your done shooting. That stuff is sticky and you don't want it on your camera and lens.
Parade Photography Tips - Video
Follow photographer Chris Corradino as he provides tips and photographs of the Veteran's Day Parade in New York City.
